Welcome to Change is Simple’s Online Learning Platform!
Overview: Today, we are going to take a closer look at our renewable energy sources with Ashley! We are going to be learning all about solar power and then doing an activity where we will build our own sundial!
Grade Level: 4-6
**For younger students, ask a friend at home for assistance!
Theme: Energy Conservation
Supervision needed? No
Essential Questions:
What does renewable energy mean?
How do we collect energy from the sun?
How is the process of solar panels getting energy from the sun similar to what plants do?
Materials Needed:
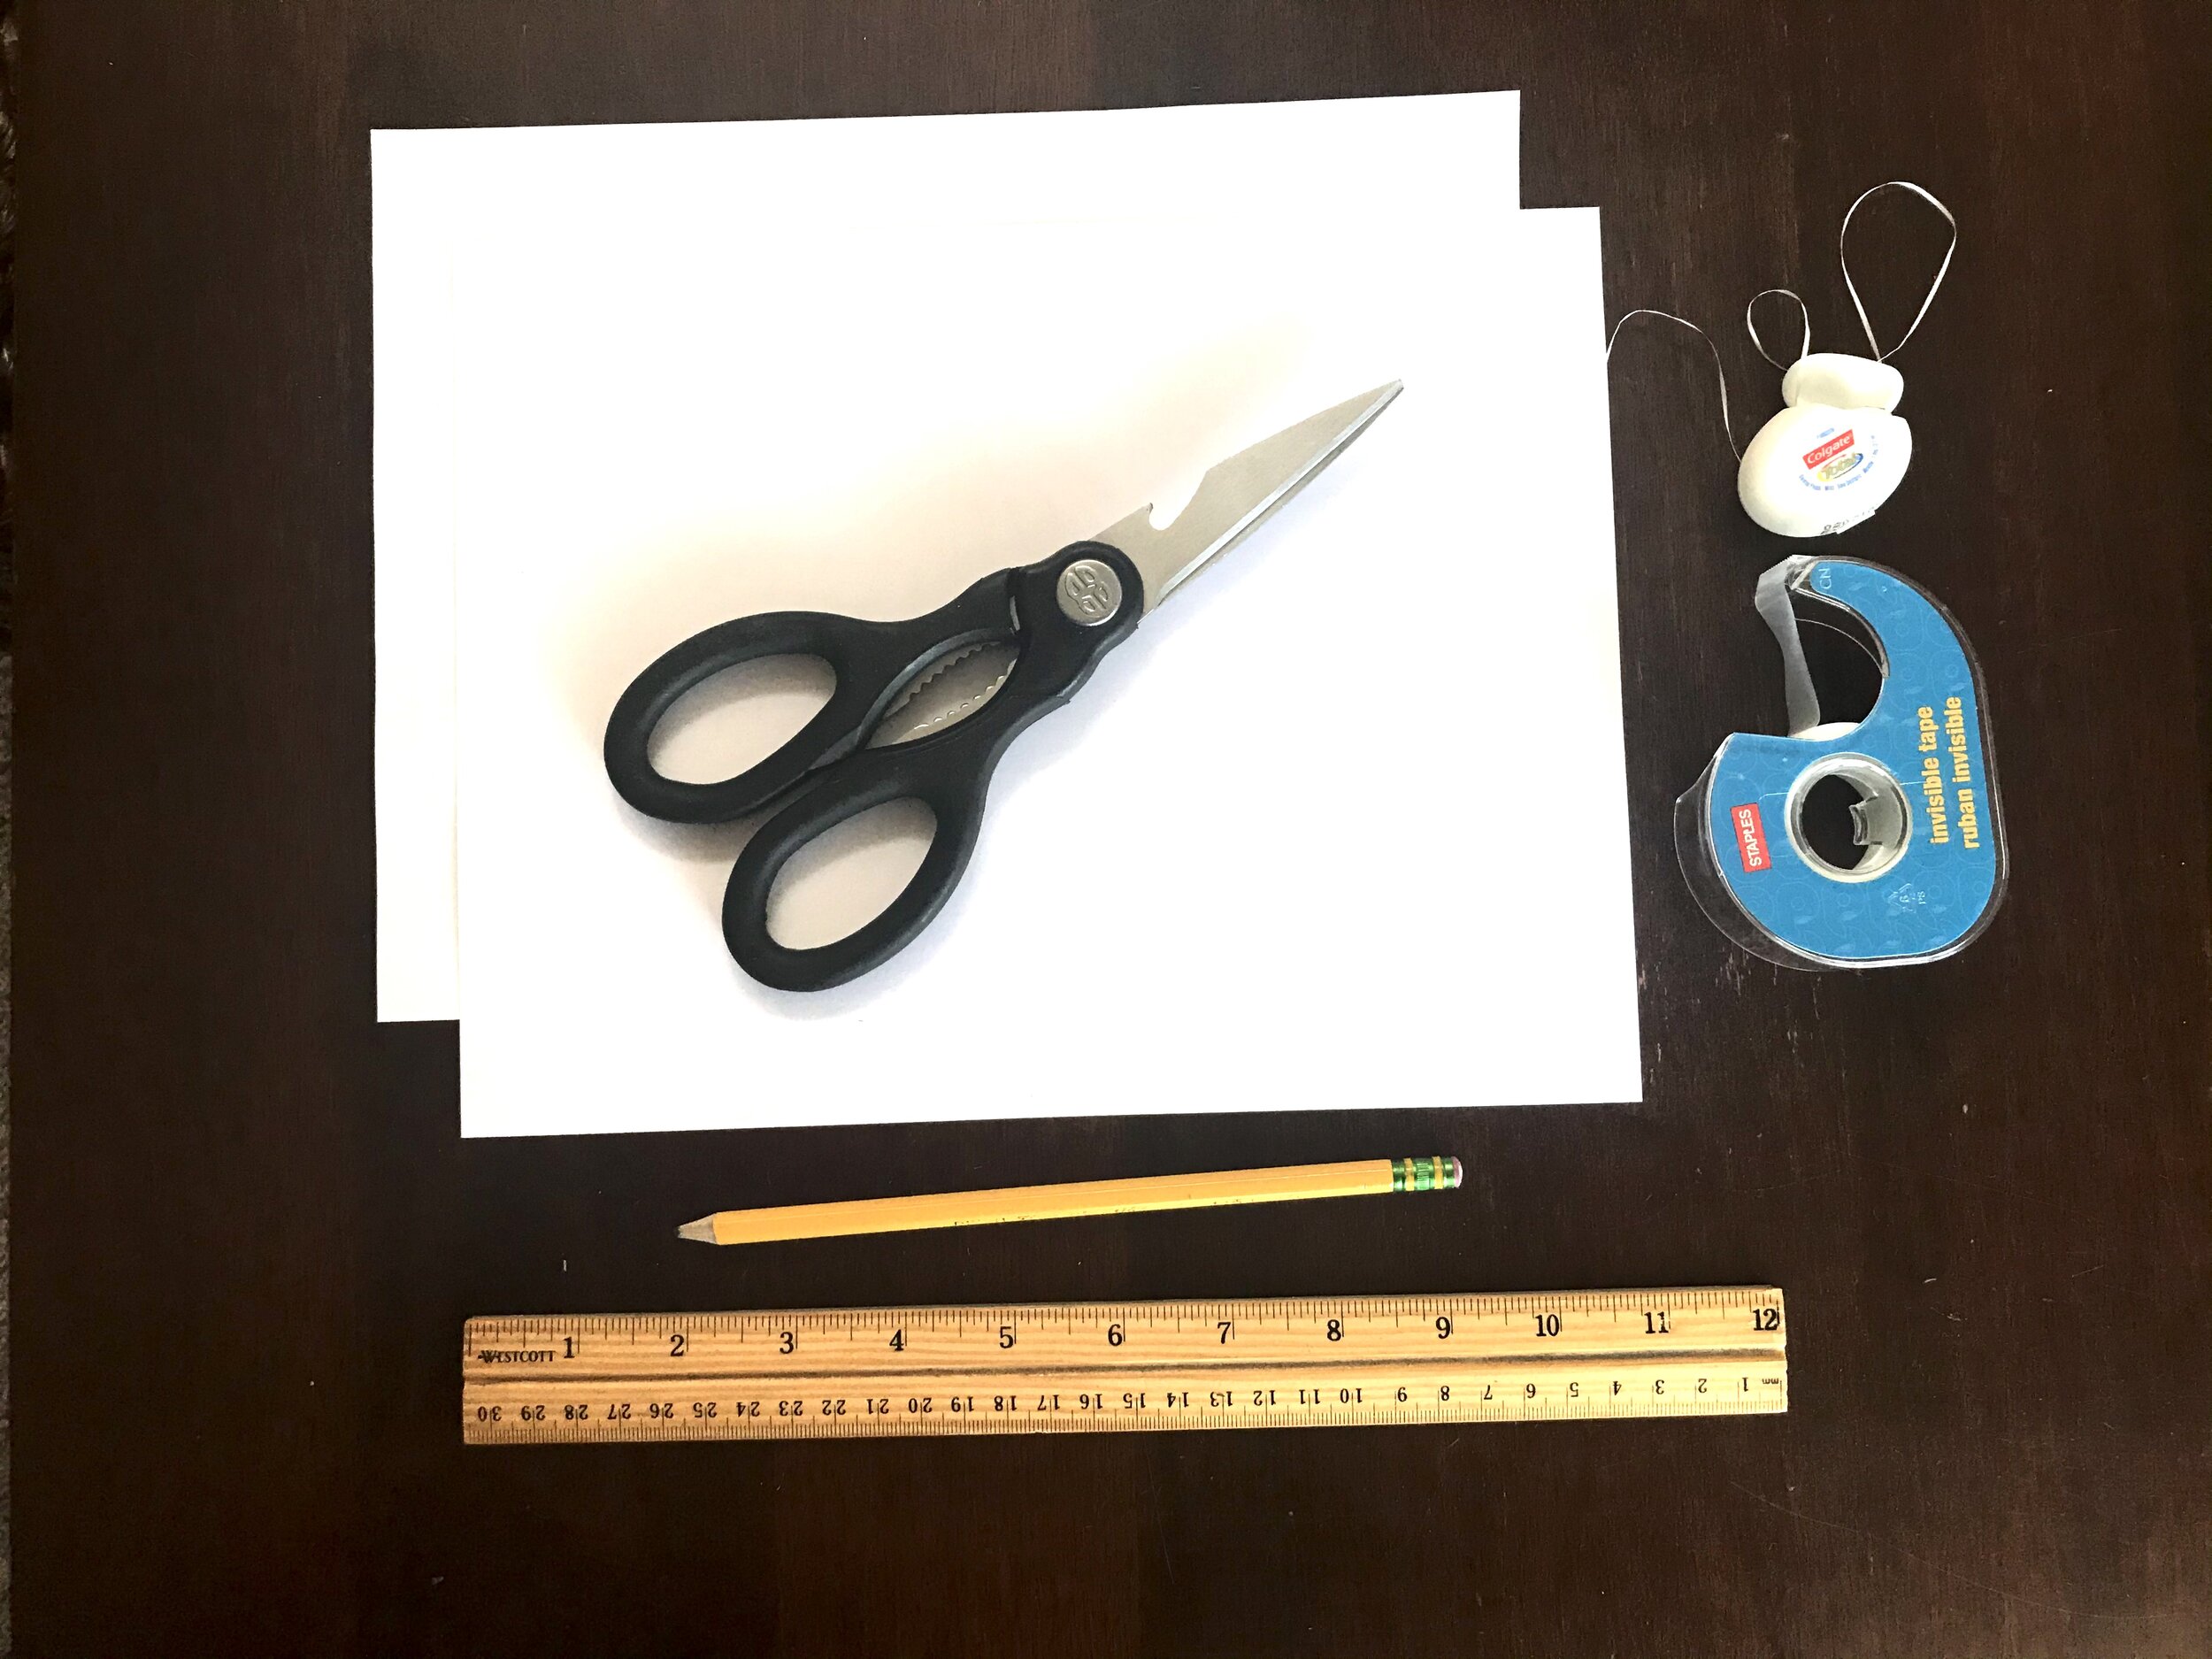
One sheet of paper
Ruler
Pencil/pen
Tape
1 foot of string/ dental floss
Smart phone with maps
Standards:
Check out the video below for today’s lesson to get started.
Vocabulary:
Renewable energy: energy from a source that is not depleted when used, such as wind or solar power
Terawatt: a unit of power equal to one trillion (1012) watts
Photon: a light particle that carries energy
Electron: a subatomic particle with a negative electric charge
Photovoltaic: relating to the production of electric current at the junction of two substances exposed to light
Solar power is a great form of renewable energy technology that we can use instead of burning fossil fuels. This is one of the reasons making the switch to clean energy is one of the major steps to helping the environment! Many areas of the United States are great candidates for solar power. In fact, Massachusetts ranks as the 6th best state to have solar panels!
Reflection Questions
Question 1: What does the sun release that solar panels absorb to create energy?
Hint: it is not sunshine!
Question 2: Would your area be a good fit for Solar panels?
Think about the weather in your region throughout the year. Do you get a lot of sun?
Question 2: Why should solar panels be installed on south facing roofs?
Refer back to the video if you need a refresher!
Activity 1: Building a Sundial
Materials:
One sheet of paper
Ruler
Pencil/pen
Tape
1 foot of string/ dental floss
Smart phone with maps
step 1: Measure 12 inches of floss/string and tie to pencil
Be sure to tie the string so all the excess is on one side of the knot.
step 2: measure 4 inches of the string starting from the pencil to the edge of the paper
* For better accuracy, measure while holding pencil up and down; the photo is to demonstrate string length and placement. See the next step for how to hold the pencil.
step 3: holding the string down to the edge of the paper (in the middle of the page), draw a semi circle from edge to edge
Before pressing down and drawing the circle, use the ruler to double check the point of your pencil measures 4 inches from the where you’re holding the string.
Be sure to hold your pencil straight up and down!
step 4: measure and mark the middle of your semi-circle
The diameter of the circle should be 8 inches making the middle at the 4 inch mark.
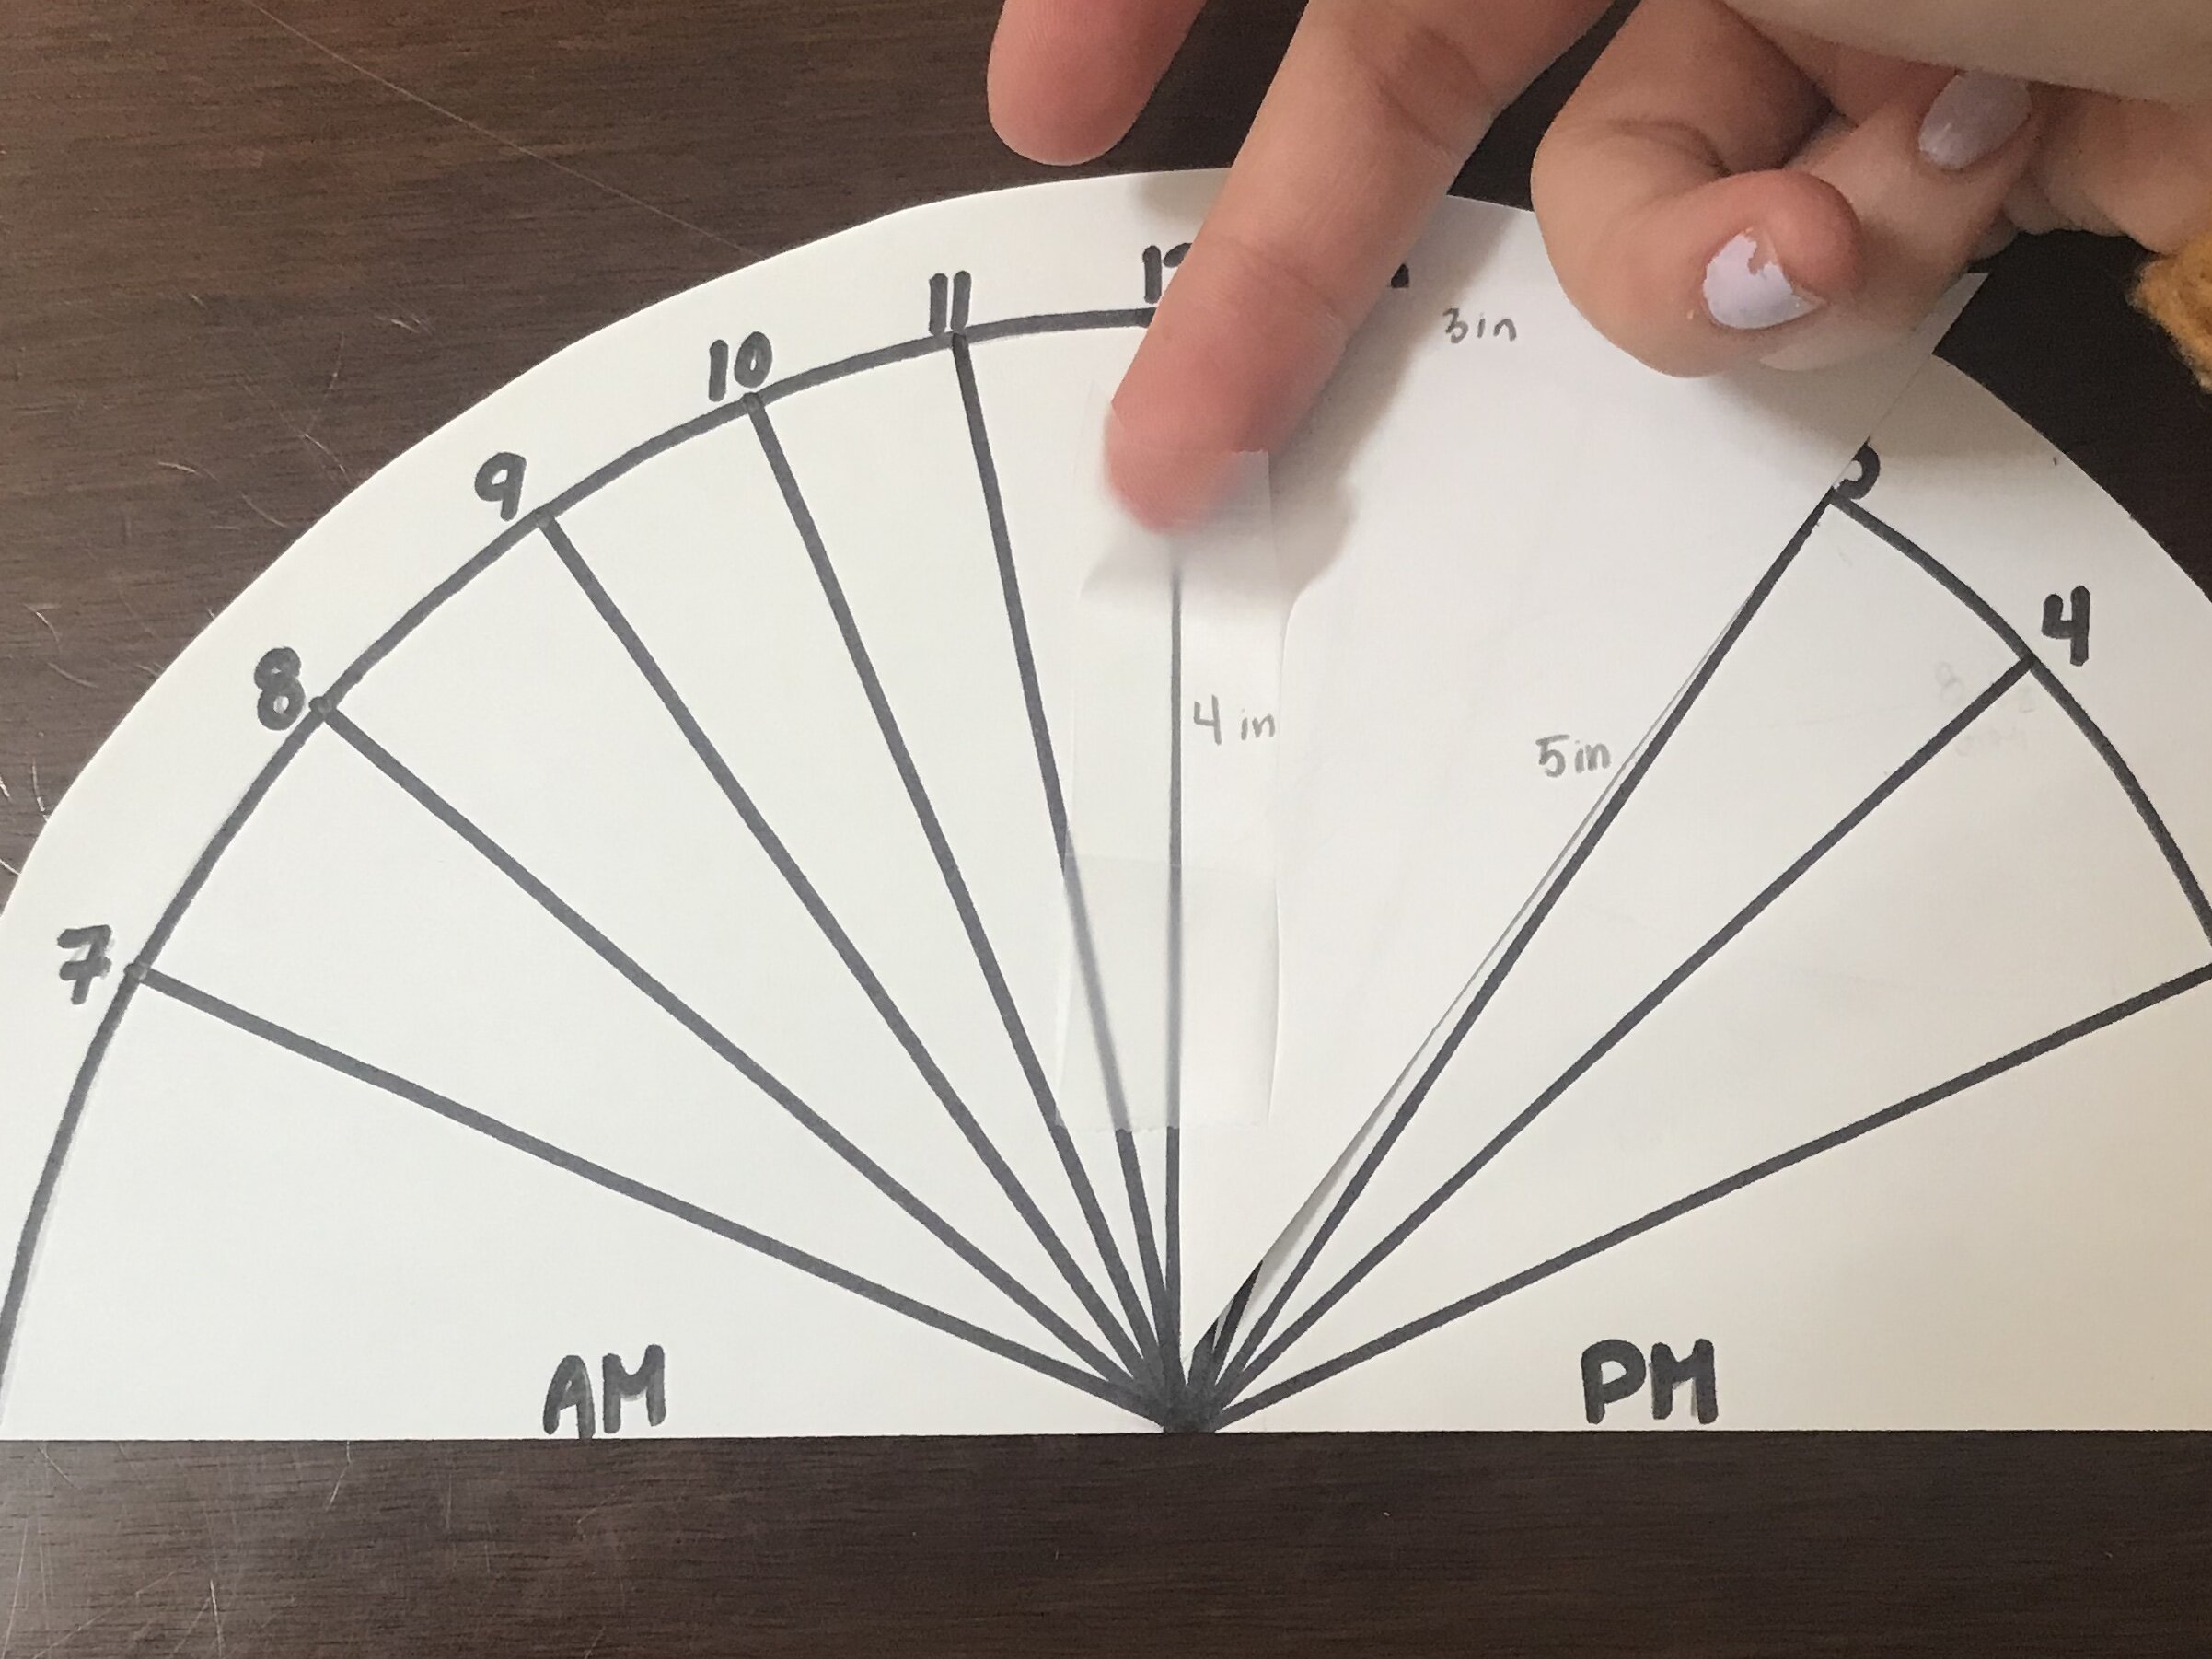
step 4: Using the ruler measure and label the following marks around the edge of the semi-circle
6 am: left edge of paper
7 am - 12: 11 mm
8 am - 12: 8 1/2 mm
9 am - 12: 6 mm
10 am - 12: 4 mm
11 am - 12: 2 mm
12 - 1 pm: 2 mm
12 - 2 pm: 4 mm
12 - 3 pm: 6 mm
12 - 4 pm: 8 1/2 mm
12 - 5 pm: 11 mm
12 - 6 pm: right edge of paper
Step 5: Draw lines from each hour marker to the middle of the clock
step 6: cut around the numbers of the clock
step 7: using the excess paper draw and cut a triangle with the following measurements
4 in x 3 in x 5 in
step 8: lay the triangle on the clock with the 4 inch side on the 12 line
Tape this edge down to the clock. Fold the triangle to the other side and tape this edge down as well.
This should allow the triangle to stand straight up. And then you’re done, you have made a sundial!
For extra fun, color and decorate however you would like!!
step 9: find the area in your house that gets the most direct sunlight throughout the day and orient your sundial
Once you have found a sunny area, place your sundial so that noon faces directly north. Use a map service/app to help with this step.
This is the same orientation roofs should have for solar panels to be the most effective! Ensuring the orientation is correct allows the sundial to be exposed to the sun for the duration of the day. When the marker for noon faces north, the sun shines on the southern side of the triangle casting the proper shadow.
STEP 10: watch your sundial track time!
Check back throughout the day and see what time it is based off the shadow the sun is casting!
See if you can use your sundial instead of a clock for the whole day!


