Energy Conservation

Renewable Energy Sources (3 of 3)

Welcome to Change is Simple’s Online Learning Platform!

Overview: Today we are going to be wrapping up our renewable energy lessons! Today you will learn all about wind power and then do an activity where you will build a wind turbine at home!

Grade Level: 4-6

**For younger students, ask a friend at home for assistance!

Theme: Energy Conservation

Supervision needed? No

Essential Questions: 

  • What does renewable energy mean?

  • How does wind power work?

Materials Needed:

  • Recyclable items found on your home!

  • Tape or glue

  • Scissors

  • Pencil

  • Pin or tack

Standards:

 
solarpanelsvsdam.jpg
 

Review

We learned a lot of information about our renewable energy sources and why they are so important from the two previous lessons. Let’s see how much you can recall! Answer the following questions before continuing.

Question 1: Define renewable energy source.

Question 2: What are fossil fuels?

Question 3: What types of structures/machines/technology works to help us harness energy from the sun and water?

 
Screen Shot 2020-05-07 at 10.59.29 AM.png

Activity

In this activity, Change is Simple challenges you to get creative and make a wind turbine out of recyclable materials you have in your home! This means yours will be personalized and unique based on the materials you choose.

Materials:

  • Recyclable items found on your home!

  • Tape or glue

  • Scissors

  • Pencil

  • Pin or tack

*** Depending on the material you have available, the activity instructions and material list might not match so get creative with how you make yours!


Step 1: Locate and clean recyclable items of choice.

Make sure they are washed and ready to use!

 
IMG_5207.jpg

Step 2: Brainstorm what design you can make out of your materials.

Parts:

  • Stand / tower

  • Blades

Try to think about what items you have that would be best for each.

 
64479067-5D2A-4596-BCD6-BFE06FE14F42.JPG

Step 3: Using the material you chose for the blades, draw and cut the shapes you will use for the turbine.

Be sure to have all the blades connected in the center for the next step.

Fold the blades down as pictured. This will help the blades catch the wind and rotate!

***The blade shape pictured are modeled after the standard shape for wind turbines used in real life, but many different shapes will work for this activity. Try experimenting with different shapes to see if it will work!

 
188CBEA0-E3DB-40A6-8298-D40E273BD5B8.JPG

Step 4: Poke a hole through the center of your blades using the pin or tip of pencil.

The blades should fit loosely in the hole made so that they can rotate.


Step 5: Using the extra material from your blades, cut a piece of material in the pictured shape and fold.

This will be used to connect your blades to your stand!

*If you need to make your stand by folding, cutting, or constructing do that before this step!

EDA19C23-A31A-40C0-A7C9-59CF210BBABD.JPG
 
4181B2FC-7793-4009-976B-1CE86974A743.JPG

Step 6: Poke a hole through the very top triangle and attach it to your stand using glue or tape.

 
IMG_5225.jpg

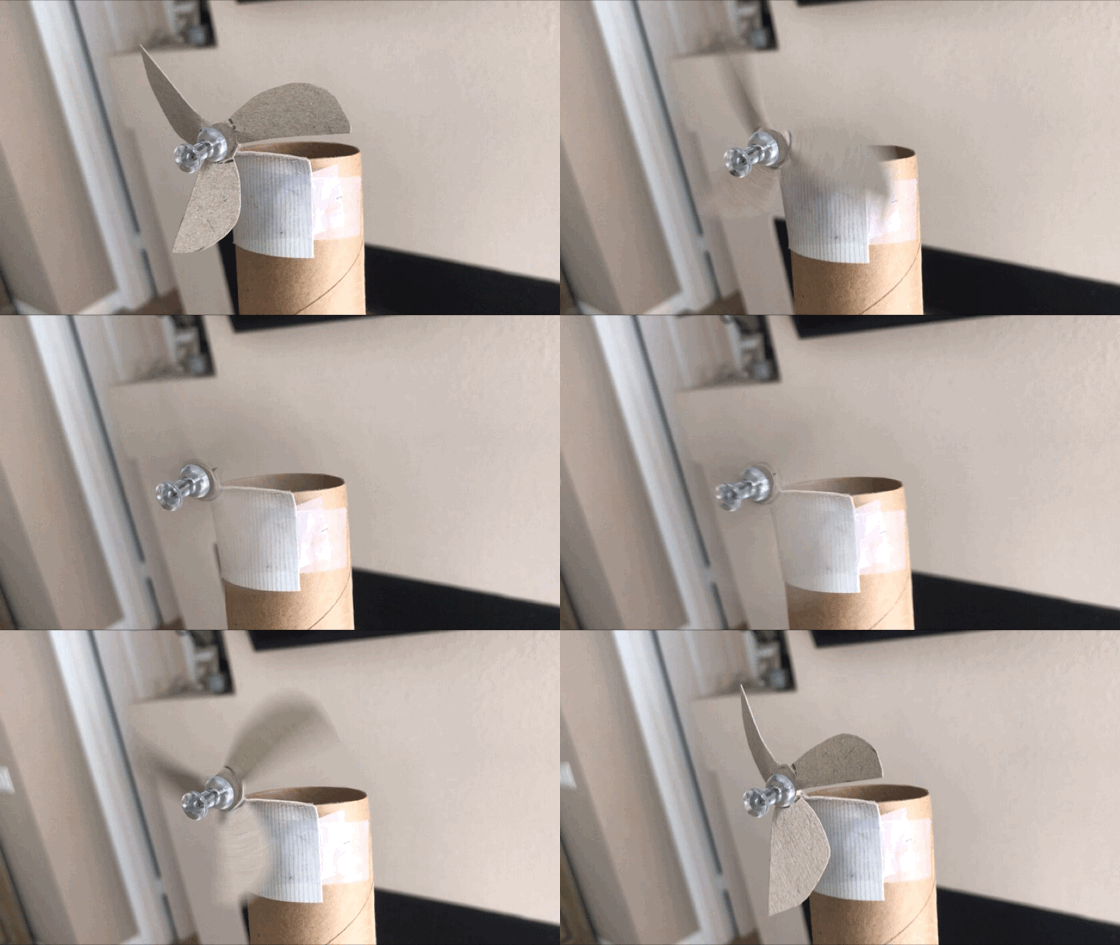
Step 7: Reassemble the turbine by putting the blades on the tack and attaching it to the stand.

Leave room between the stand and the end of the tack (as pictured) so that the blades can spin.

 
animated.GIF

Step 8: And done, you made a wind turbine! Place it in front of a fan, wind source, or blow on the turbine blades to see it in action!

*** Yours will most likely look different than the activity example depending on the materials you have available and that is totally awesome and encouraged! We would love to see the design you come up with!


Reflection

Awesome job this week! Here are some important take aways from this week’s lessons:

  • Renewable energy sources are those which will never run out or be depleted and are healthy for the environment.

  • Renewable energy is energy harnessed naturally from the environment (sun, water, wind).

  • Using renewable and clean energy sources prevents pollution and excess carbon dioxide emissions.

  • Renewable energy sources replace the use of burning fossil fuels which are harmful to the environment.

Making the transition to clean energy sources that benefit not only us, but the planet is what will help make our future a brighter place. The use of solar panels and hydropower turbines to power our energy grid lowers our carbon footprint (the level of carbon dioxide emissions we are responsible for) and the amount of pollution we produce. This is because when we are using clean energy we are not burning fossil fuels and polluting the environment. When there is less pollution and carbon dioxide in the air, our environment is healthier and so are we! If something has harmful effects on environment, it probably isn’t beneficial to our health either.

With today’s technological advancements, the transition to renewable energy has never been easier. This hopefully means we will be transitioned to clean energy sources in no time! But to do so, we all need to do our part in understanding why is important to use renewable energy sources and begin to take actions to help the environment in our daily lives. See how many answers you can brainstorm to the following questions!

  1. Why is it important to use clean and renewable energy?

  2. What does a healthy environment look like to you?

  3. What are the benefits of having a clean environment to live in?

  4. What actions can you start taking today to reduce your impact and help the environment?


Did you enjoy today’s activity? Stay tuned for more, and in the meantime…

Send us a photo of yourself doing today's activity and if you would like, please share your name(s) and where you are from with cisonline@changeissimple.org


Renewable Energy Sources (2 of 3)

Welcome to Change is Simple’s Online Learning Platform!

Overview: Next on the list of renewable energy sources is hydropower! Following solar power, hydropower is the second most popular renewable energy source in the US. In today’s lesson you will learn more about how water can generate electricity, how we use hydropower, and even create your own turbine! Check out the video below to get started.

Grade Level: 4-6

**For younger students, ask a friend at home for assistance!

Theme: Energy Conservation

Supervision needed? No

Essential Questions: 

  • What does renewable energy mean?

  • How does hydropower work?

Materials Needed:

  • Bottle Cap

  • Pencil/Pen

  • Ruler

  • Paper Plate

  • Tape

  • Scissors

  • Stick

Standards:


Vocabulary:

  • Electromagnetic generator: converts motive force or mechanical energy (in this case it is the water pushing the turbine) into electrical power

  • Potential energy: mechanical energy, stored energy, or energy caused by its position (like when a ball is placed at the top of a hill)

  • Transformer: a device that takes power from the generator and converts it to higher-voltage current which we can then use

  • Gravitational pull: force which tries to pull two objects toward each other

Activity one

Today we will be creating our own hydropower turbines!!

You will need:

  • Bottle Cap

  • Pencil/Pen

  • Ruler

  • Paper Plate

  • Tape

  • Scissors

  • Stick

 
IMG_0379.jpg

Step One: Take the cap to a bottle and draw a circle around the center of the paper plate.

 
IMG_0380.JPG

Step 2: Cut the edge of the paper plate off.

 
IMG_0382.JPG

Step 3: Take the ruler and draw 4 lines across the plate. Top to bottom, side to side, and the middle sections - all through the center of the plate.

 
IMG_0384.JPG

Step 4: Take the scissors and cut on the lines from the outside edge of the plate to the edge of the circle drawn in the center.

 
IMG_0387.JPG

Step 5: Then fold the blades into position. Leaving a small lip at the edge of each blade that stays flat.

 
IMG_0390.JPG

Step 6: If you want to make your blades more water proof, you can put tape over the blade edges.

 
IMG_0394.JPG

Step 7: Take a stick or pole and stick it through the center of the plate. 


Step 8: Now test out your amazing homemade hydropower turbine!

**Tip! If it is too tight around the stick, it might not spin well. So make it a bit looser.

**Also, you can add a rubber band behind the blade on the stick if it slides off too easily.


reflection

Question 1: Try increasing the flow of water over your turbine. Does the turbine spin faster?

Question 2: Do you think more energy generated when the turbine spins faster? Explain your answer.

Refer back to the video if you need a refresher, or do independent research!


Did you enjoy today’s activity? Stay tuned for more, and in the meantime…

Send us a photo of yourself doing today's activity and if you would like, please share your name(s) and where you are from with cisonline@changeissimple.org

Renewable Energy Sources (1 of 3)

Welcome to Change is Simple’s Online Learning Platform!

Overview: Today, we are going to take a closer look at our renewable energy sources with Ashley! We are going to be learning all about solar power and then doing an activity where we will build our own sundial!

Grade Level: 4-6

**For younger students, ask a friend at home for assistance!

Theme: Energy Conservation

Supervision needed? No

Essential Questions: 

  • What does renewable energy mean?

  • How do we collect energy from the sun?

  • How is the process of solar panels getting energy from the sun similar to what plants do?

Materials Needed:

  • One sheet of paper

  • Ruler

  • Pencil/pen

  • Tape

  • 1 foot of string/ dental floss

  • Smart phone with maps

Standards:

Check out the video below for today’s lesson to get started.


Vocabulary:

  • Renewable energy: energy from a source that is not depleted when used, such as wind or solar power

  • Terawatt: a unit of power equal to one trillion (1012) watts

  • Photon: a light particle that carries energy

  • Electron: a subatomic particle with a negative electric charge

  • Photovoltaic: relating to the production of electric current at the junction of two substances exposed to light

Solar power is a great form of renewable energy technology that we can use instead of burning fossil fuels. This is one of the reasons making the switch to clean energy is one of the major steps to helping the environment! Many areas of the United States are great candidates for solar power. In fact, Massachusetts ranks as the 6th best state to have solar panels!

Reflection Questions

Question 1: What does the sun release that solar panels absorb to create energy?

Hint: it is not sunshine!


Question 2: Would your area be a good fit for Solar panels?

Think about the weather in your region throughout the year. Do you get a lot of sun?


Question 2: Why should solar panels be installed on south facing roofs?

Refer back to the video if you need a refresher!


Activity 1: Building a Sundial

IMG_5717.JPG

Materials:

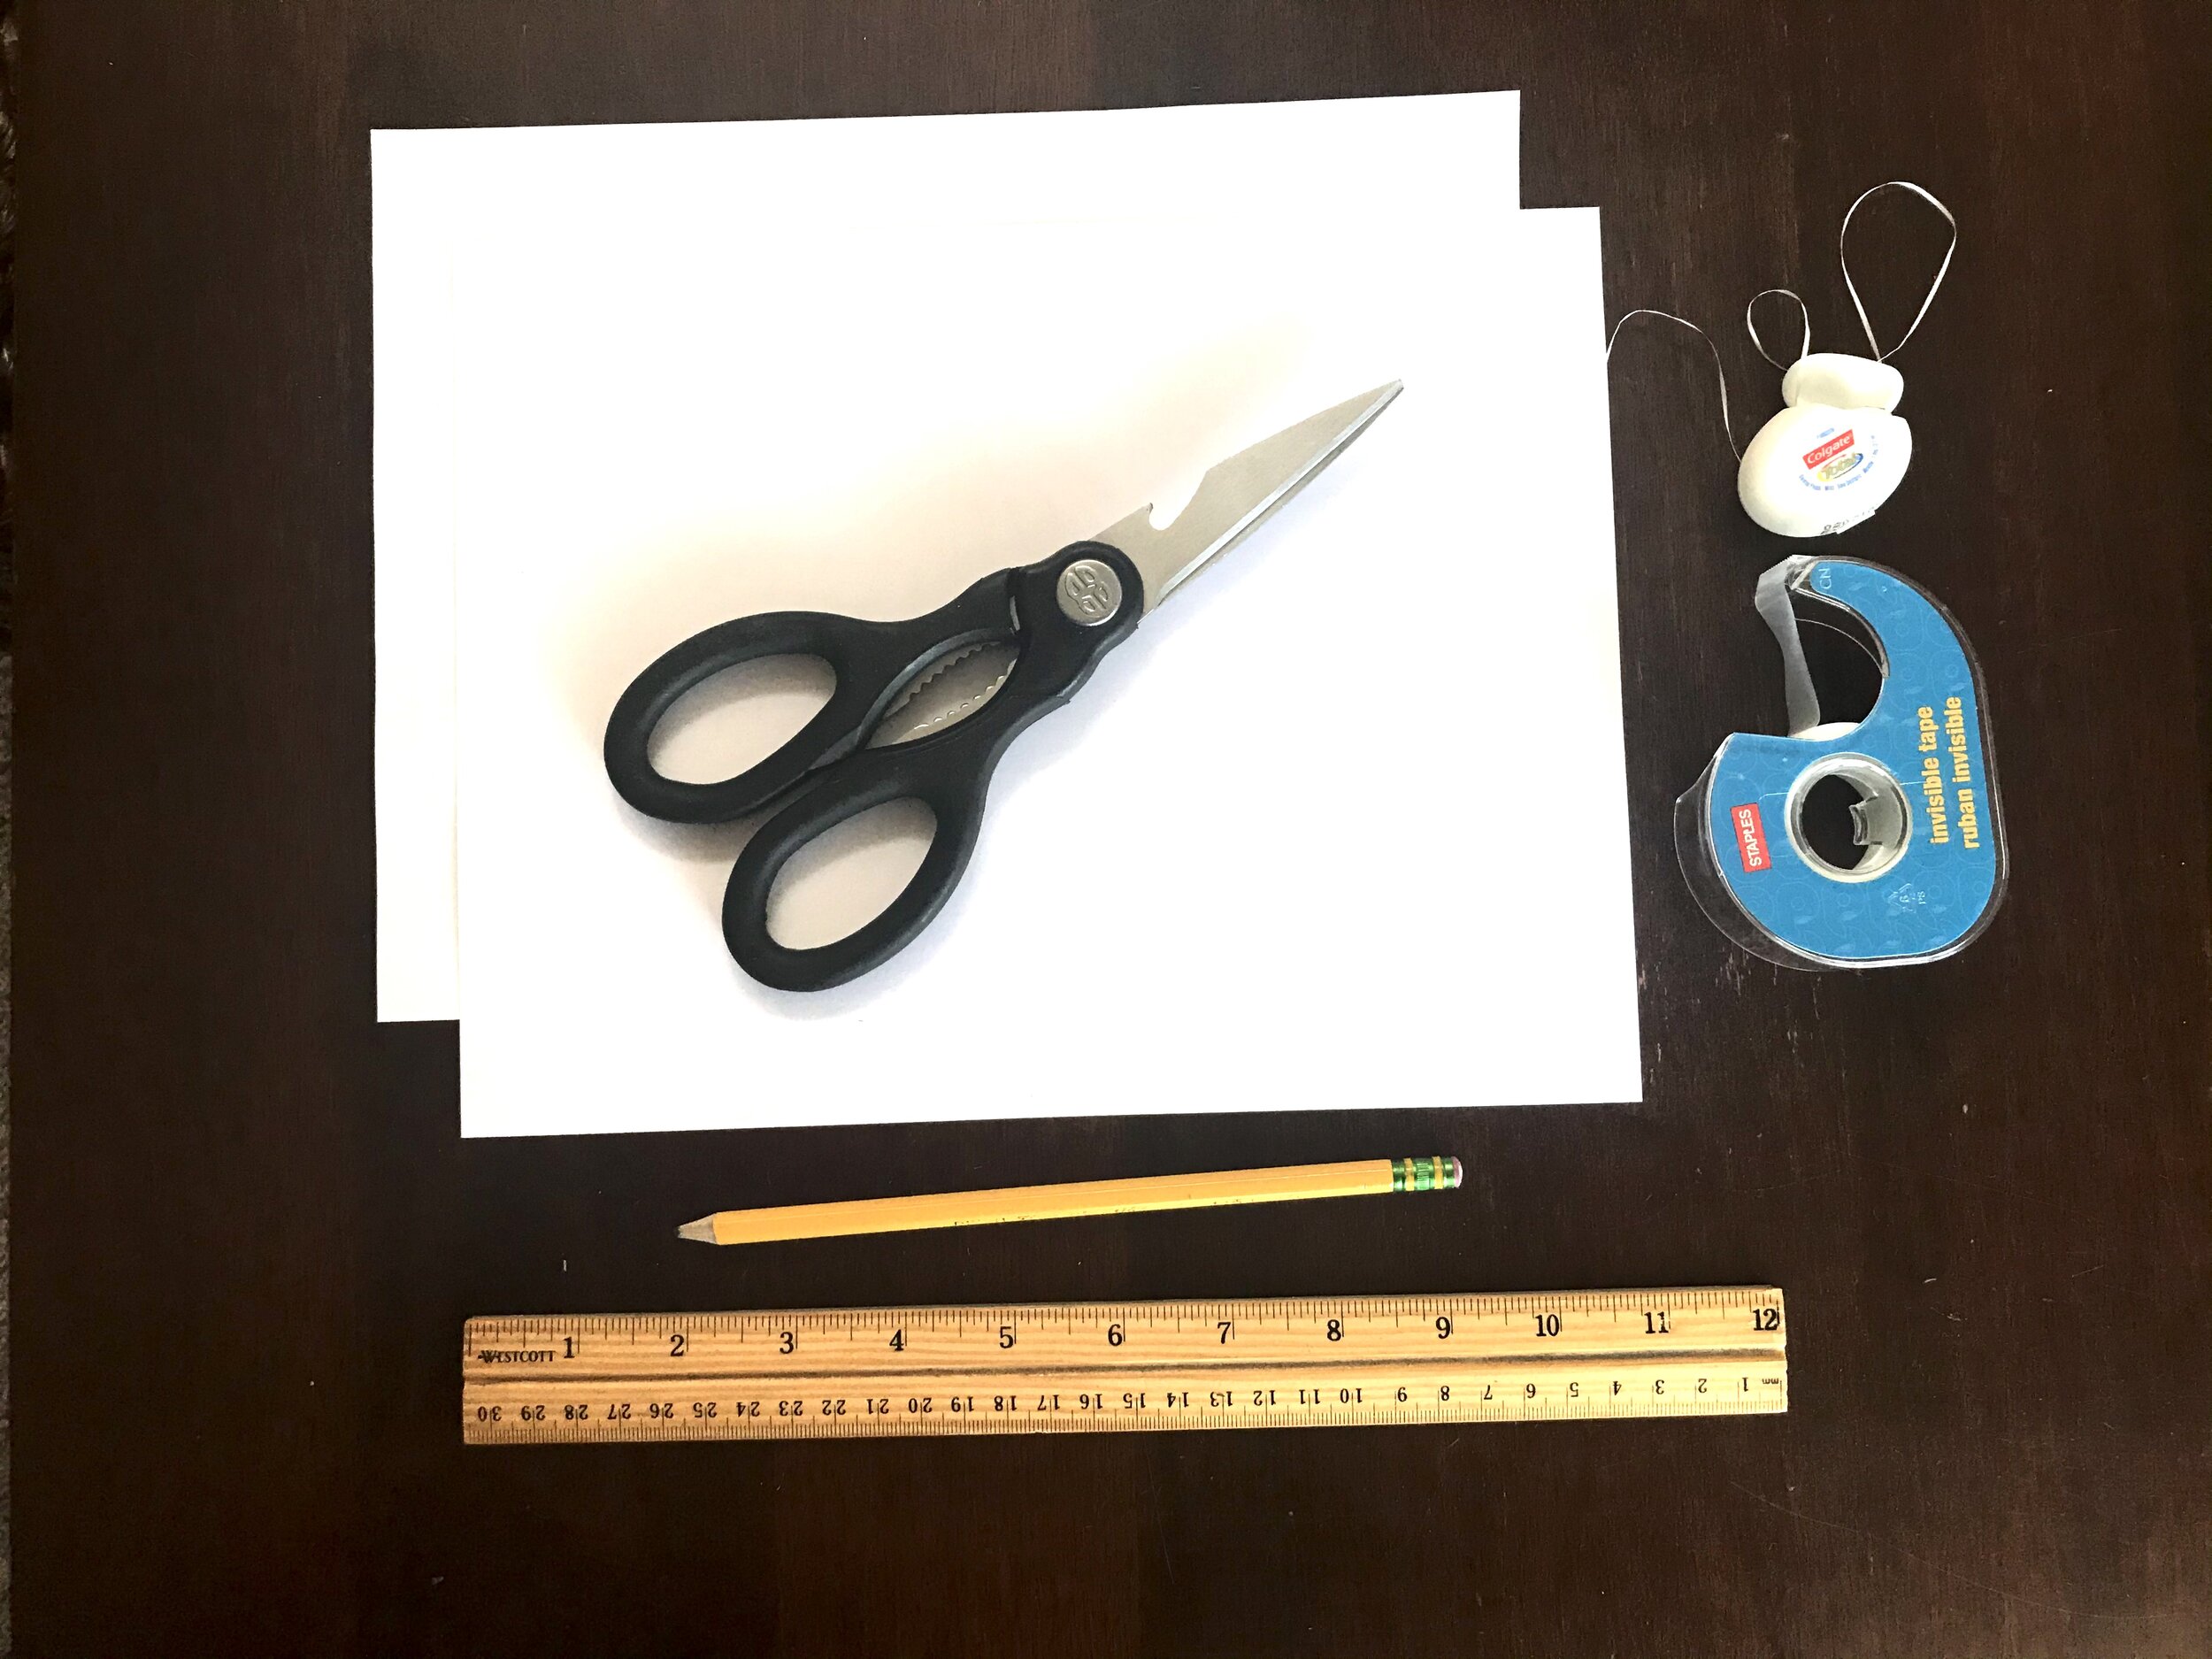
  • One sheet of paper

  • Ruler

  • Pencil/pen

  • Tape

  • 1 foot of string/ dental floss

  • Smart phone with maps


step 1: Measure 12 inches of floss/string and tie to pencil

Be sure to tie the string so all the excess is on one side of the knot.

 
IMG_1404.JPG

step 2: measure 4 inches of the string starting from the pencil to the edge of the paper

* For better accuracy, measure while holding pencil up and down; the photo is to demonstrate string length and placement. See the next step for how to hold the pencil.

 
gif_1587340449.GIF

step 3: holding the string down to the edge of the paper (in the middle of the page), draw a semi circle from edge to edge

Before pressing down and drawing the circle, use the ruler to double check the point of your pencil measures 4 inches from the where you’re holding the string.

Be sure to hold your pencil straight up and down!

 
IMG_4420.jpg

step 4: measure and mark the middle of your semi-circle

The diameter of the circle should be 8 inches making the middle at the 4 inch mark.

 
IMG_1018.JPG

step 4: Using the ruler measure and label the following marks around the edge of the semi-circle

6 am: left edge of paper

7 am - 12: 11 mm

8 am - 12: 8 1/2 mm

9 am - 12: 6 mm

IMG_4425.jpg

10 am - 12: 4 mm

11 am - 12: 2 mm

12 - 1 pm: 2 mm

12 - 2 pm: 4 mm

12 - 3 pm: 6 mm

12 - 4 pm: 8 1/2 mm

12 - 5 pm: 11 mm

12 - 6 pm: right edge of paper

 
IMG_4428.jpg

Step 5: Draw lines from each hour marker to the middle of the clock

 
IMG_4429.jpg

step 6: cut around the numbers of the clock


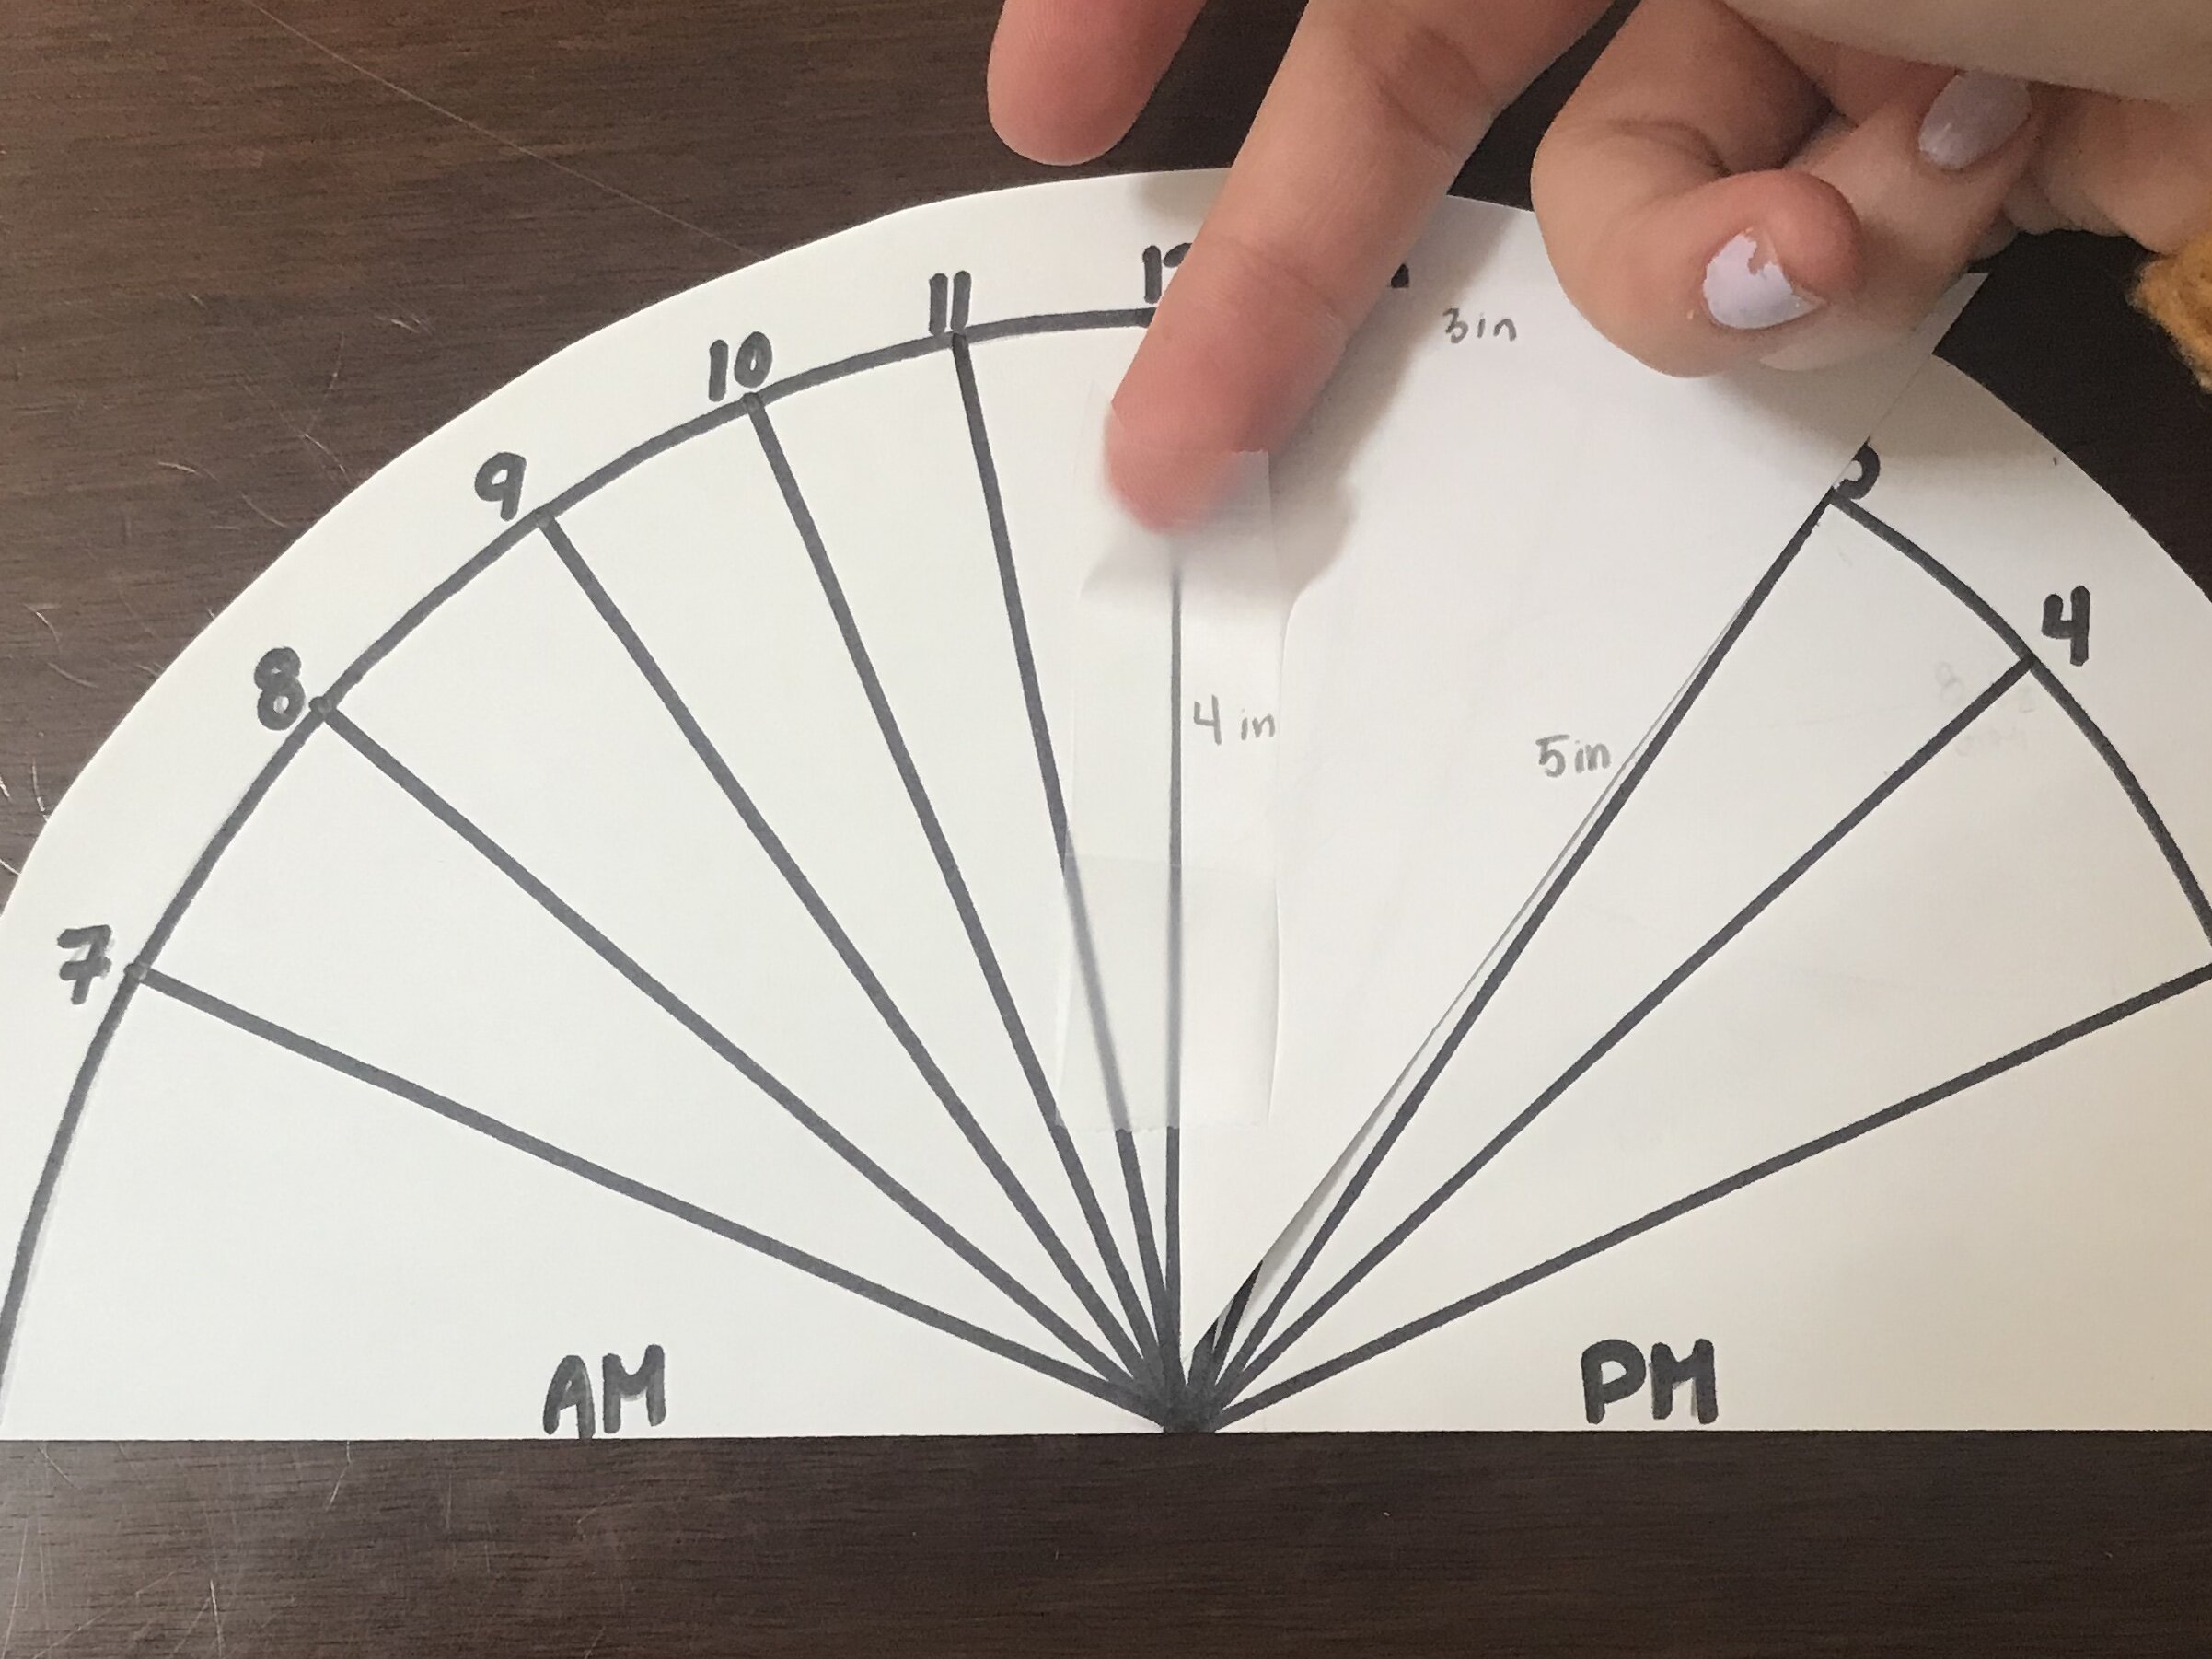
step 7: using the excess paper draw and cut a triangle with the following measurements

4 in x 3 in x 5 in

IMG_9994.JPG
 
IMG_5180.JPG
IMG_1531.JPG

step 8: lay the triangle on the clock with the 4 inch side on the 12 line

Tape this edge down to the clock. Fold the triangle to the other side and tape this edge down as well.

 
IMG_3730.JPG

This should allow the triangle to stand straight up. And then you’re done, you have made a sundial!

For extra fun, color and decorate however you would like!!


step 9: find the area in your house that gets the most direct sunlight throughout the day and orient your sundial

Once you have found a sunny area, place your sundial so that noon faces directly north. Use a map service/app to help with this step.

This is the same orientation roofs should have for solar panels to be the most effective! Ensuring the orientation is correct allows the sundial to be exposed to the sun for the duration of the day. When the marker for noon faces north, the sun shines on the southern side of the triangle casting the proper shadow.

IMG_4443.jpg
 

STEP 10: watch your sundial track time!

Check back throughout the day and see what time it is based off the shadow the sun is casting!

See if you can use your sundial instead of a clock for the whole day!

IMG_4473.jpg
 

Did you enjoy today’s activity? Stay tuned for more, and in the meantime…

Send us a photo of yourself doing today's activity and if you would like, please share your name(s) and where you are from with cisonline@changeissimple.org

What is your Carbon Footprint?

Welcome to Change is Simple’s Online Learning Platform!

Overview: Today we are going to start this week off by talking about something that relates to every part of our life. Today’s topic is focused on carbon footprints which are impacted by the activities we do, the food we eat, the products we buy, and even how we get around. We are going to talk all about what a carbon footprint is, how it affects our planet and you are even going to calculate your own! Most importantly, we are going to learn some ways we can all lower our carbon footprints!

Grade Level:  4-6

Theme: Energy Conservation

Supervision needed? Yes

Essential Questions: 

  • What is a carbon footprint? 

  • How can I influence my carbon footprint? 

Materials Needed:

  • Computer

Standards:

  • 13.1 Describe types of natural resources and their connection with health.

  • Ecological Health 13.2 Describe how business, industry, and individuals can work cooperatively to solve ecological health problems, such as conserving natural resources and decreasing pollution

  • Ecological Health 13.4 Identify individual and community responsibility in ecological health.

  • Ecological Health 14.2 Identify ways the physical environment is related to individual and community health

  • 14.3 List practices and products that make living safer.


Today we are going to start this week off by talking about something that relates to every part of our life. From the activities we do, to the food we eat and the products we buy, even how we get around. Today’s topic is focused on carbon footprints. We are going to talk all about what a carbon footprint is, how it affects our planet and you are even going to calculate your own! Most importantly, we are going to learn some ways we can all lower our carbon footprints!

Check out the video below to start todays lesson!


Lets take a look at your Carbon Footprint:

Now we are going to find out what your carbon footprint is! Pick a calculator below that best fits your grade. The calculator is going to ask you a bunch of question about what you do in your every day life. Remember almost every thing that we do releases carbon dioxide into the atmosphere.

  • When we use electricity in our homes that power needs to be created somewhere! We burn fossil fuels at a power plants to create electricity. This releases massive amounts of carbon dioxide into the air.

  • Our food is not all grown in our back yard, it is usually grown in another state or country and that food needs to get to you! The distance your food has to travel adds to your carbon footprint.

  • We don’t walk everywhere; we use cars, trains, planes, and trucks to get around. All of these modes of transportation use gas and oil. Again, when these are burned carbon dioxide is released into our atmosphere.

  • Every product that you use; toys, clothes, care products and anything else you might use in your home. It all came from somewhere, whether its oil that is used to make plastic or the processes to create things like cotton, manufacturing creates a ton of carbon dioxide pollution which adds to your carbon footprint!

Once you have found your carbon footprint, record it below and answer the questions to figure out what adds the most to your footprint and how you can lower it.

There is also a math extension attached related to your carbon footprint to help keep your math skills sharp.

Make sure to check out the youtube video “Carbon Footprint explained” below for additional information

Carbon Footprint Calculators:

What’s your carbon footprint? (this depends on which Footprint calculator you use)

Score: _________

OR

Tons/ Pounds of C02: _________

  1. Can you define carbon footprint?

  2. What added the most to your carbon footprint? Why? ( Food, electricity, transportation, waste)

  3. List 4 ways you think you can personally do better?


Reflection:

  1. Do you want to have a large or small carbon footprint?

  2. What are some ways carbon is released into our atmosphere?

  3. What does carbon pollution in the air do to our planet?

  4.  Submit some actions that you are doing to lower your carbon footprint!


Did you enjoy today’s activity? Stay tuned for more, and in the meantime…

Send us a photo of yourself doing today's activity and if you would like, please share your name(s) and where you are from with cisonline@changeissimple.org

Energy Grid

Welcome to Change is Simple’s Online Learning Platform!

Overview: In this activity, students will draw their own community on a sheet of paper to help identify how electricity travels from a power plant through power lines to all the buildings in a community. Students will list as many things as they can that require electricity. 

Grade Level:  2-4

Theme: Energy Conservation

Supervision needed? No

Essential Questions: 

  • What is an energy grid? 

  • How can we produce electricity without pollution? 

  • What do fossil fuels produce when burned? 

  • What are three fossil fuels?

Materials Needed:

  • One sheet white paper

  • Assorted markers

  • Computer

Standards:

  • K-2-ETS1-2. Develop a simple sketch, drawing, or physical model to illustrate how the shape of an object helps it function as needed to solve a given problem.

  • 4-PS3-2  Make observations to provide evidence that energy can be transferred from place to place by sound, light, heat, and electric currents.

  • 4-ESS3-1 Obtain and combine information to describe that energy and fuels are derived from natural resources and their uses affect the environment.

  • 14.2 Identify ways the physical environment is related to individual and community health

  • 13.4 Identify individual and community responsibility in ecological health.

Welcome to Change is Simple’s Family Fun Activities! Today’s topic is energy grids. Today we will get to learn about how important electricity is and how it gets to the different buildings in our towns! Enjoy the this fun activity to learn about how electricity travels to us and how it is created.

energy grid activity instructions

Student-Led Experiment    

Activity Duration: 20 Minutes

grid.jpeg

Materials Needed:

1. One sheet white paper

2. Assorted Markers

3. Computer

step 1: set up your town grid

1) Take a sheet of paper and draw the outline of your town.

2) Draw squares in BLUE for where the houses and apartments are in your town.

Draw squares in ORANGE for restaurants, schools, and other town buildings.

3) Draw at least one large GREEN park or field in your town.

4) Draw a power plant on your map as a BLACK filled in square.

5) Let’s make a grid! Draw dotted lines in BLACK that connect each building to the power plant.

step 2: what uses electricity?

An energy grid like you drew is how we get electricity to all of the buildings in our town! We need electricity for so many things! The majority of our power comes from a power plant

Question 1: List 10 things in your house that use electricity?

We typically use what are called fossil fuels like coal, oil, and natural gas in our power plants. When we use these to make our electricity, it produces air pollution. This is not good for us to breathe in. Let’s brainstorm some alternatives. Hint: let’s think of some ways to make electricity that do not pollute.

Question 2: What other ways can we make electricity that does not produce pollution?

step 3: let’s make it shine!

Now we want to make our electricity grid a little more “green.” So let’s add some Renewable energy such as solar panels, wind turbines, and hydroelectric power. These renewable energy sources can produce electricity for us and also not produce pollution! Yay! So let’s add some to our town today. 

1) Draw solar panels as YELLOW filled in boxes on houses.

Draw wind turbines in YELLOW in any open fields.

2) Draw YELLOW dotted lines connecting the wind turbines & solar panels to the grid!

You’re adding clean renewable energy to the grid! This source does NOT produce air pollution!

step 4: let’s reflect

Question 1: The more electricity we use, the more _____________ we produce. Fill in the blank. (Hint: look at step 2 for help)

Question 2: Research where the closest power plant is to your town. Where is it and what fuel does it burn? (coal, natural gas, oil, etc.)

Question 3: Why do we want to add renewable energy to our energy grid?

Question 4: What are some ways we can use less electricity?

step 5: Let’s wrap up

Now that you have completed this activity, you hopefully understand that when we use a lot of electricity, we produce a lot of air pollution. We use fossil fuels like coal, oil, and natural gas to create electricity in a power plant. When we burn fossil fuels, it produces air pollution. This is not healthy for local communities' air quality and it also contributes to climate change. Let’s brainstorm some ways that we can help lower our electricity use! Hopefully you have brainstormed some ways in your reflection. 

The Change is Simple team has come up with a few ways to help you get started:

  • Play outside. 

  • Play cards, board games, and read books

  • Set timers for how long we use our electronic devices 

  • Shut off the lights when we are not using them

Did you enjoy today’s activity? Stay tuned for more, and in the meantime…

Send us a photo of yourself doing today's activity and if you would like, please share your name(s) and where you are from with cisonline@changeissimple.org